Hey there, it’s your coach Jordan Briones.
If there is one part of the court that separates players who are stuck at their current level from players who keep climbing, it is the transition zone.
Not the kitchen. Not the baseline. The middle ground in between.
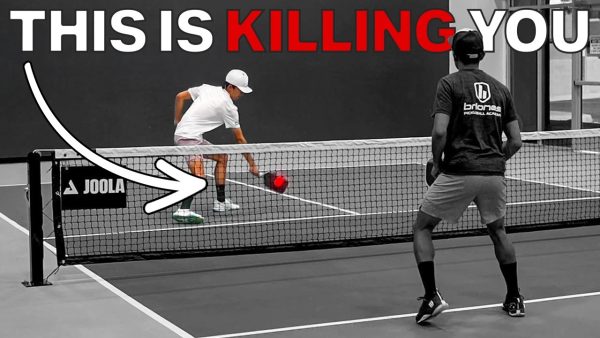
That stretch of court between the baseline and the non-volley zone is where most rallies are won or lost, where most errors happen, and where most players have absolutely no idea what they’re doing. It’s also the key area for understanding how to put pressure on opponents in the transition zone instead of scrambling, popping balls up, getting attacked, and wondering why you can’t seem to get up to the line in a strong position.
The good news is this. Once you fix how you move through the transition zone, everything else starts to fall into place. Let’s break it down.
Why the Split Step Is the Foundation of Everything in Transition
It does not matter what level you are watching. When you see a really good player move through the transition zone, there is always one thing you will notice in their footwork.
The split step.
Right before their opponent makes contact, or directly after they themselves have hit, a good player drops into a balanced, wide-based stance with their feet parallel to each other and their knees bent. This is not optional. This is the foundation that makes every reset, every volley, and every decision in transition possible.
I see two common problems when players try to split step. The first is too narrow of a stance. Their feet are too close together, and now they are reaching from an upright position instead of already being low and ready. The second is a staggered stance — one foot noticeably ahead of the other. When your hips are misaligned, your balance is off and you lose your ability to react equally to a forehand or a backhand.
The goal is simple. Feet parallel. Wide base. Low and balanced. Hips facing the ball. That position puts you in the best possible place to handle whatever comes next.
And here is a quick balance check worth doing in practice. A solid split step should be stable enough that someone could not easily push you forward or backward. If your chest is too far forward or you are leaning back, you are going to be popping balls up or late to react. Get centered. Get balanced. That is where everything starts.
How to Master the Transition Zone: The Key to Moving Up in Pickleball
Paddle Position in the Transition Zone – Adjusting Height and Elbow for Control
Here is something that most players never think about consciously, but the best players do automatically.
Your paddle height in transition should change depending on where you are in the court.
The general rule is this: the deeper you are in the transition zone — meaning the closer you are to the baseline — the lower your paddle should be. Why? Because from deep in the court, your opponent has the angle to drive the ball down at your knees, shins, and feet. If your paddle is up at chest or shoulder level, you are already behind the ball and scrambling.
Keep your paddle low and ready when you are deeper. As you make progress toward the kitchen, you can bring it up slightly. But always be thinking about where the ball is most likely to arrive and position your paddle to meet it there.
The other thing I want you to pay attention to is your elbow. A lot of players hold their paddle close to their body in transition, which means they are reaching out at the last second to make contact. Instead, keep your elbow out in front of your hips with the paddle extended. From that position, resetting the ball is simply a matter of opening your paddle face and letting the ball deflect softly into the kitchen. You are not swinging. You are redirecting.
Stay Low Through Your Resets Instead of Rising Up
Once you have your split step and your paddle position dialed in, the next thing to lock in is what your body is doing during the actual reset.
The biggest mistake I see is players rising up through the shot.
You are in a good low position, the ball is coming, and then right at contact you stand up. Your knees straighten, your paddle comes up with you, and the ball sails higher than you wanted. It floats. It sits up. And your opponent has a free attack.
The fix is straightforward. Stay low through the entire shot. Keep your knees bent. Use your shoulder as the primary lever for the reset, not your arm or wrist. Your legs provide the stability, and your shoulder provides the control. The motion is compact and quiet.
Think of it this way. You are not hitting the ball. You are absorbing it and redirecting it. The less excess movement you have, the more consistent your resets will be. Stay low from start to finish and let your shoulder do the work.
Make Smarter Decisions – Read Opponent Contact in Transition
Here is where transition starts to feel like chess instead of just survival.
As you are moving through the transition zone, the single most important thing to watch is the height of your opponent’s contact point on their side of the net.
If your opponent is making contact well above the net level, that is a warning sign — recognizing this quickly is a key part of how to master the transition zone in pickleball. They have the angle to drive the ball down at you hard. In that moment, either hold your position and brace for the attack, or if you have time, take a small step back to give yourself more space to defend.
But if your opponent’s contact point is low — below the net or at net level — that is your green light. They have to hit upward to clear the net, which means the ball is coming to you at a manageable height. That is when you advance. Move forward, make up ground, and get closer to the non-volley zone line.
This decision-making becomes faster and more automatic the more reps you put in. But you have to be consciously watching for it. Make a habit of tracking your opponent’s contact height every single time you are in transition.
Multiple Resets Are Key to Transitioning Successfully
I see this mindset all the time and it is quietly costing players a lot of points.
A player hits a third shot drop, starts moving in, takes one split step and reset, and then immediately tries to rush all the way up to the kitchen. And because the quality of that reset was not quite good enough, their opponent is attacking again before they are ready.
The reality is that getting to the non-volley zone safely is almost always a multi-step process — and understanding this is a big part of how to master the transition zone in pickleball. One drop. One reset. Another checkpoint. Maybe another. You are not sprinting to the line. You are earning your way there, one quality shot at a time.
The height of the ball will tell you how much progress you can make on any given step. If the ball comes back high, hold your ground. If it comes back low, advance. Trust the process and do not rush it. Patience in transition wins more points than urgency.
3 Drills to Master the Transition Zone
Drill One: Perfecting Your Balance and Split Step in the Transition Zone
This is the first drill and you need to master it before anything else.
Stand in the middle of the transition zone. Practice dropping into your split step — wide base, parallel feet, low and centered, paddle ready. Do it deliberately. Stop and check yourself each time.
Is your chest slightly in front of or even with your knees? Good. Is it too far forward or leaning back? Adjust. Have a partner try to gently push you. If you wobble or tip, your balance is not where it needs to be yet.
Do this over and over until that balanced, stable split step becomes completely automatic. Everything else in transition depends on it.
Drill Two: Forcing Multiple Checkpoints to Build Patient Transition Habits
Once your split step is solid, move to this drill. Its entire purpose is to break the habit of rushing to the kitchen in one move.
Have a partner feed you a ball from the baseline. Hit your drop or drive, move in, and take a deliberate split step at your first checkpoint. Reset the ball. Then take another split step at your second checkpoint before advancing further. Do this even if the ball is short and you could technically get all the way in.
The point of the drill is to train your body and your brain to be comfortable making multiple stops, which is essential if you truly want to understand how to master the transition zone in pickleball. At higher levels, with more pace and topspin flying around, you are going to need this. Players who only know how to rush straight in get exposed fast. Players who can stop, reset, and read the play are the ones who consistently get to the line in a strong position.
Drill Three: Live Transition Reps with Realistic Pace and Decision-Making
This is the drill that brings it all together, and regardless of your level, you should be doing this one regularly.
One player stands at the non-volley zone and feeds a deep, realistic return — with pace and depth — to the player at the baseline. The baseline player hits a drive or drop and transitions in. From there, it is live.
The focus is on decision-making in real time. Watch the contact height. Advance when the ball is low. Hold or retreat when the ball is high. Take your checkpoints. Stay low through every reset. Communicate with your partner about what you were seeing and what decisions you were making.
This is the closest thing to match play you can do while still isolating the transition zone. The more reps you get here, the faster your reads become and the more confident you will feel moving through the middle of the court in an actual game. You can even incorporate pickleball backhand dink targets into these drills to practice spotting openings and executing precise shots under pressure.
Final Thoughts
The transition zone is not glamorous. Nobody talks about it the way they talk about erne shots or topspin drives. But fixing how you move through it — your split step, your paddle position, your resets, your decision-making — will do more for your overall game than almost anything else.
Because when you stop hemorrhaging points in the middle of the court, you stop playing catch-up. You start arriving at the kitchen in a strong position. Your partner trusts you more. Your opponents have fewer easy attacks.
Start with the split step. Get that balance dialed in. Then layer in everything else.
This is the one thing. Fix it, and watch your game change.
See you on the courts,
Coach Jordan Briones