Hey there, it’s your coach Jordan Briones.
Let me ask you something. How many times have you gotten a perfect ball — floaty, shallow, just sitting there — and instead of attacking it, you just dink it right back?
If you’re being honest with yourself, probably more times than you’d like to admit. And I get it. Defending feels safe. Dinking feels consistent. But here’s the truth: if you’re always reacting and never initiating, you’re handing control of the point to your opponent every single time.
That changes today.
I put together three drills that are going to train your brain and your body to recognize attacking opportunities and act on them — fast. You don’t need a fancy setup. You just need a partner, some balls, and about ten focused minutes.
Let’s get into it.
The 3 Drills to Master the Pickleball Attacking Mindset and Control Every Point
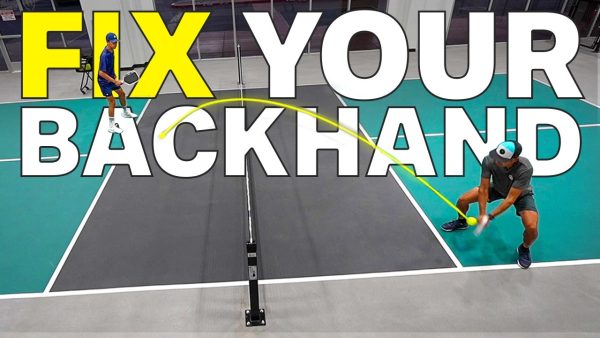
Drill One: The Dead Dink Attack Drill
First, let’s make sure we’re on the same page about what a dead dink actually is.
A dead dink is a ball that comes at you without much spin and without much depth. It floats into the kitchen a little shorter than usual, sits up just a little, and basically says “here I am — do something with me.” At every level, you’re going to see these balls. The question is whether you recognize them and attack, or whether you just knock it back and keep rallying.
Here’s how the drill works.
You and your partner line up straight on at the kitchen. Your partner’s job is to feed you dead dink after dead dink — intentionally shallow, low spin balls — on either side of your body. Your job is to attack every single one.
You’ve got two options on how to attack it. You can roll it with topspin, using a low-to-high brushing motion to keep it low and push it away from your opponent. Or you can speed it up off the bounce, picking a spot and driving it with pace. The one thing you absolutely cannot do is dink it back like nothing happened.
That’s the whole point of this drill. You’re training your eyes to see the dead dink for what it is — an opportunity — and conditioning yourself to respond offensively instead of passively.
Play it out to five points. Take turns feeding and attacking. And when you’re the one feeding? Don’t just stand there. Be ready to counter, because your partner is going to be coming at you.
A quick note on target selection: When you’re working on where to attack, start with your opponent’s dominant side. For a right-handed player, that right hip area is a great first target. Once they start sitting on it and anticipating it, you can shift to the shoulder or open up crosscourt. Use this pickleball offensive drill to experiment with those spots in a low-pressure environment.
Drill Two: Offensive Transition Swing Volleys
This one is a little different because we’re moving away from the kitchen and into transition — which is a completely different situation with its own set of decisions.
Here’s the scenario. You’ve hit your shot and you’re moving forward. You’ve split stepped. You’re balanced. Now Grayson — or whoever you’re drilling with — feeds you a ball. If it’s at your feet, you reset. Simple. But if it comes in at waist level or above? That’s your green light to attack.
For this drill, your partner stands at the kitchen and feeds balls to your right or left while you’re positioned in the transition zone. Your job is to hit a swinging volley on anything waist level or higher, apply pressure, and then play the point out from there.
Now here’s where I see a lot of players — even at higher levels — go wrong on this one.
They get a perfect ball in transition, load up, rip it hard… and hit it right at their opponent’s chest. Guess what? That’s actually one of the easiest balls to counter. A hard flat ball to the chest gives your opponent all the time and space to reset it right back into a good spot.
What you actually want to do is get the ball away from them — stretch them out wide, or more importantly, get it down toward their feet. A ball that dips toward the feet in transition is exponentially harder to deal with than one that comes in at chest height. Drive it down, or drive it wide. Either one works. Both together is even better.
Play to five and focus on two things: picking a smart spot, and recovering after your attack so you’re ready for whatever comes back.
Drill Three: Attacking Short Balls on Thirds
The third drill is about building an offensive mindset from the very start of the rally.
Here’s the situation a lot of players find themselves in. The return comes back weak. Short. Attackable. And instead of driving it, they drop it. Safe choice, right? Except you just gave up a free point.
This drill trains you to stop doing that.
Your partner stands at the kitchen. You start at the baseline. They feed you balls that are attackable — not perfect returns, but floaty or short ones that are begging to be driven. Your job is to rip that ball, forehand or backhand, and look to close the point aggressively.
The mindset here is key. When you see a weak ball coming in, your first thought should be attack — not drop, not reset, not play it safe. You recognize the opportunity, you drive it with intention, and then you play out whatever comes next.
Now, if your drive is good — low, away from your opponent, forcing them to reach or dig — you can stay aggressive, close the net, and look for something to put away. But if they neutralize it and bring it back down low, then yes, you transition to a drop and keep working your way in. The point is you initiated. You forced them to respond on your terms instead of the other way around.
Play to five and focus on one thing above everything else: trusting your attack on that first ball. Don’t talk yourself out of it. See the short ball, drive it, and go from there.
Why These Three Drills Work Together
Here’s what I love about this progression.
The first drill teaches you to recognize and attack the dead dink right at the kitchen. The second drill trains you to apply pressure when you’re coming forward through transition. And the third drill builds the aggressive mindset from the very baseline before you’ve even gotten to the net.
Together, they cover every phase of the rally — and they all reinforce the same core habit. See an attackable ball. Attack it.
You’re not going to become an offensive player by playing it safe in practice. You become one by deliberately putting yourself in attacking situations over and over using pickleball offensive drills until it stops feeling uncomfortable and starts feeling automatic.
That’s what these drills do. And ten focused minutes of this kind of training is worth more than an hour of mindless rallying where you never push yourself to initiate.
Final Thoughts – Train Yourself to Play More Offensively
Defense has its place. Resets matter. Dinking well is important. I’ll never tell you otherwise.
But if you want to actually win more points instead of just extending rallies, you have to be willing to pull the trigger when the opportunity is there.
These three drills give you a safe, structured way to practice doing exactly that. Run through them with a partner. You don’t need to be perfect right away — you just need to start seeing the balls that you’ve been ignoring and doing something about them.
Your offense won’t develop by accident. But with the right drills and the right mindset, it’ll develop faster than you think.
See you on the courts,
Coach Jordan Briones